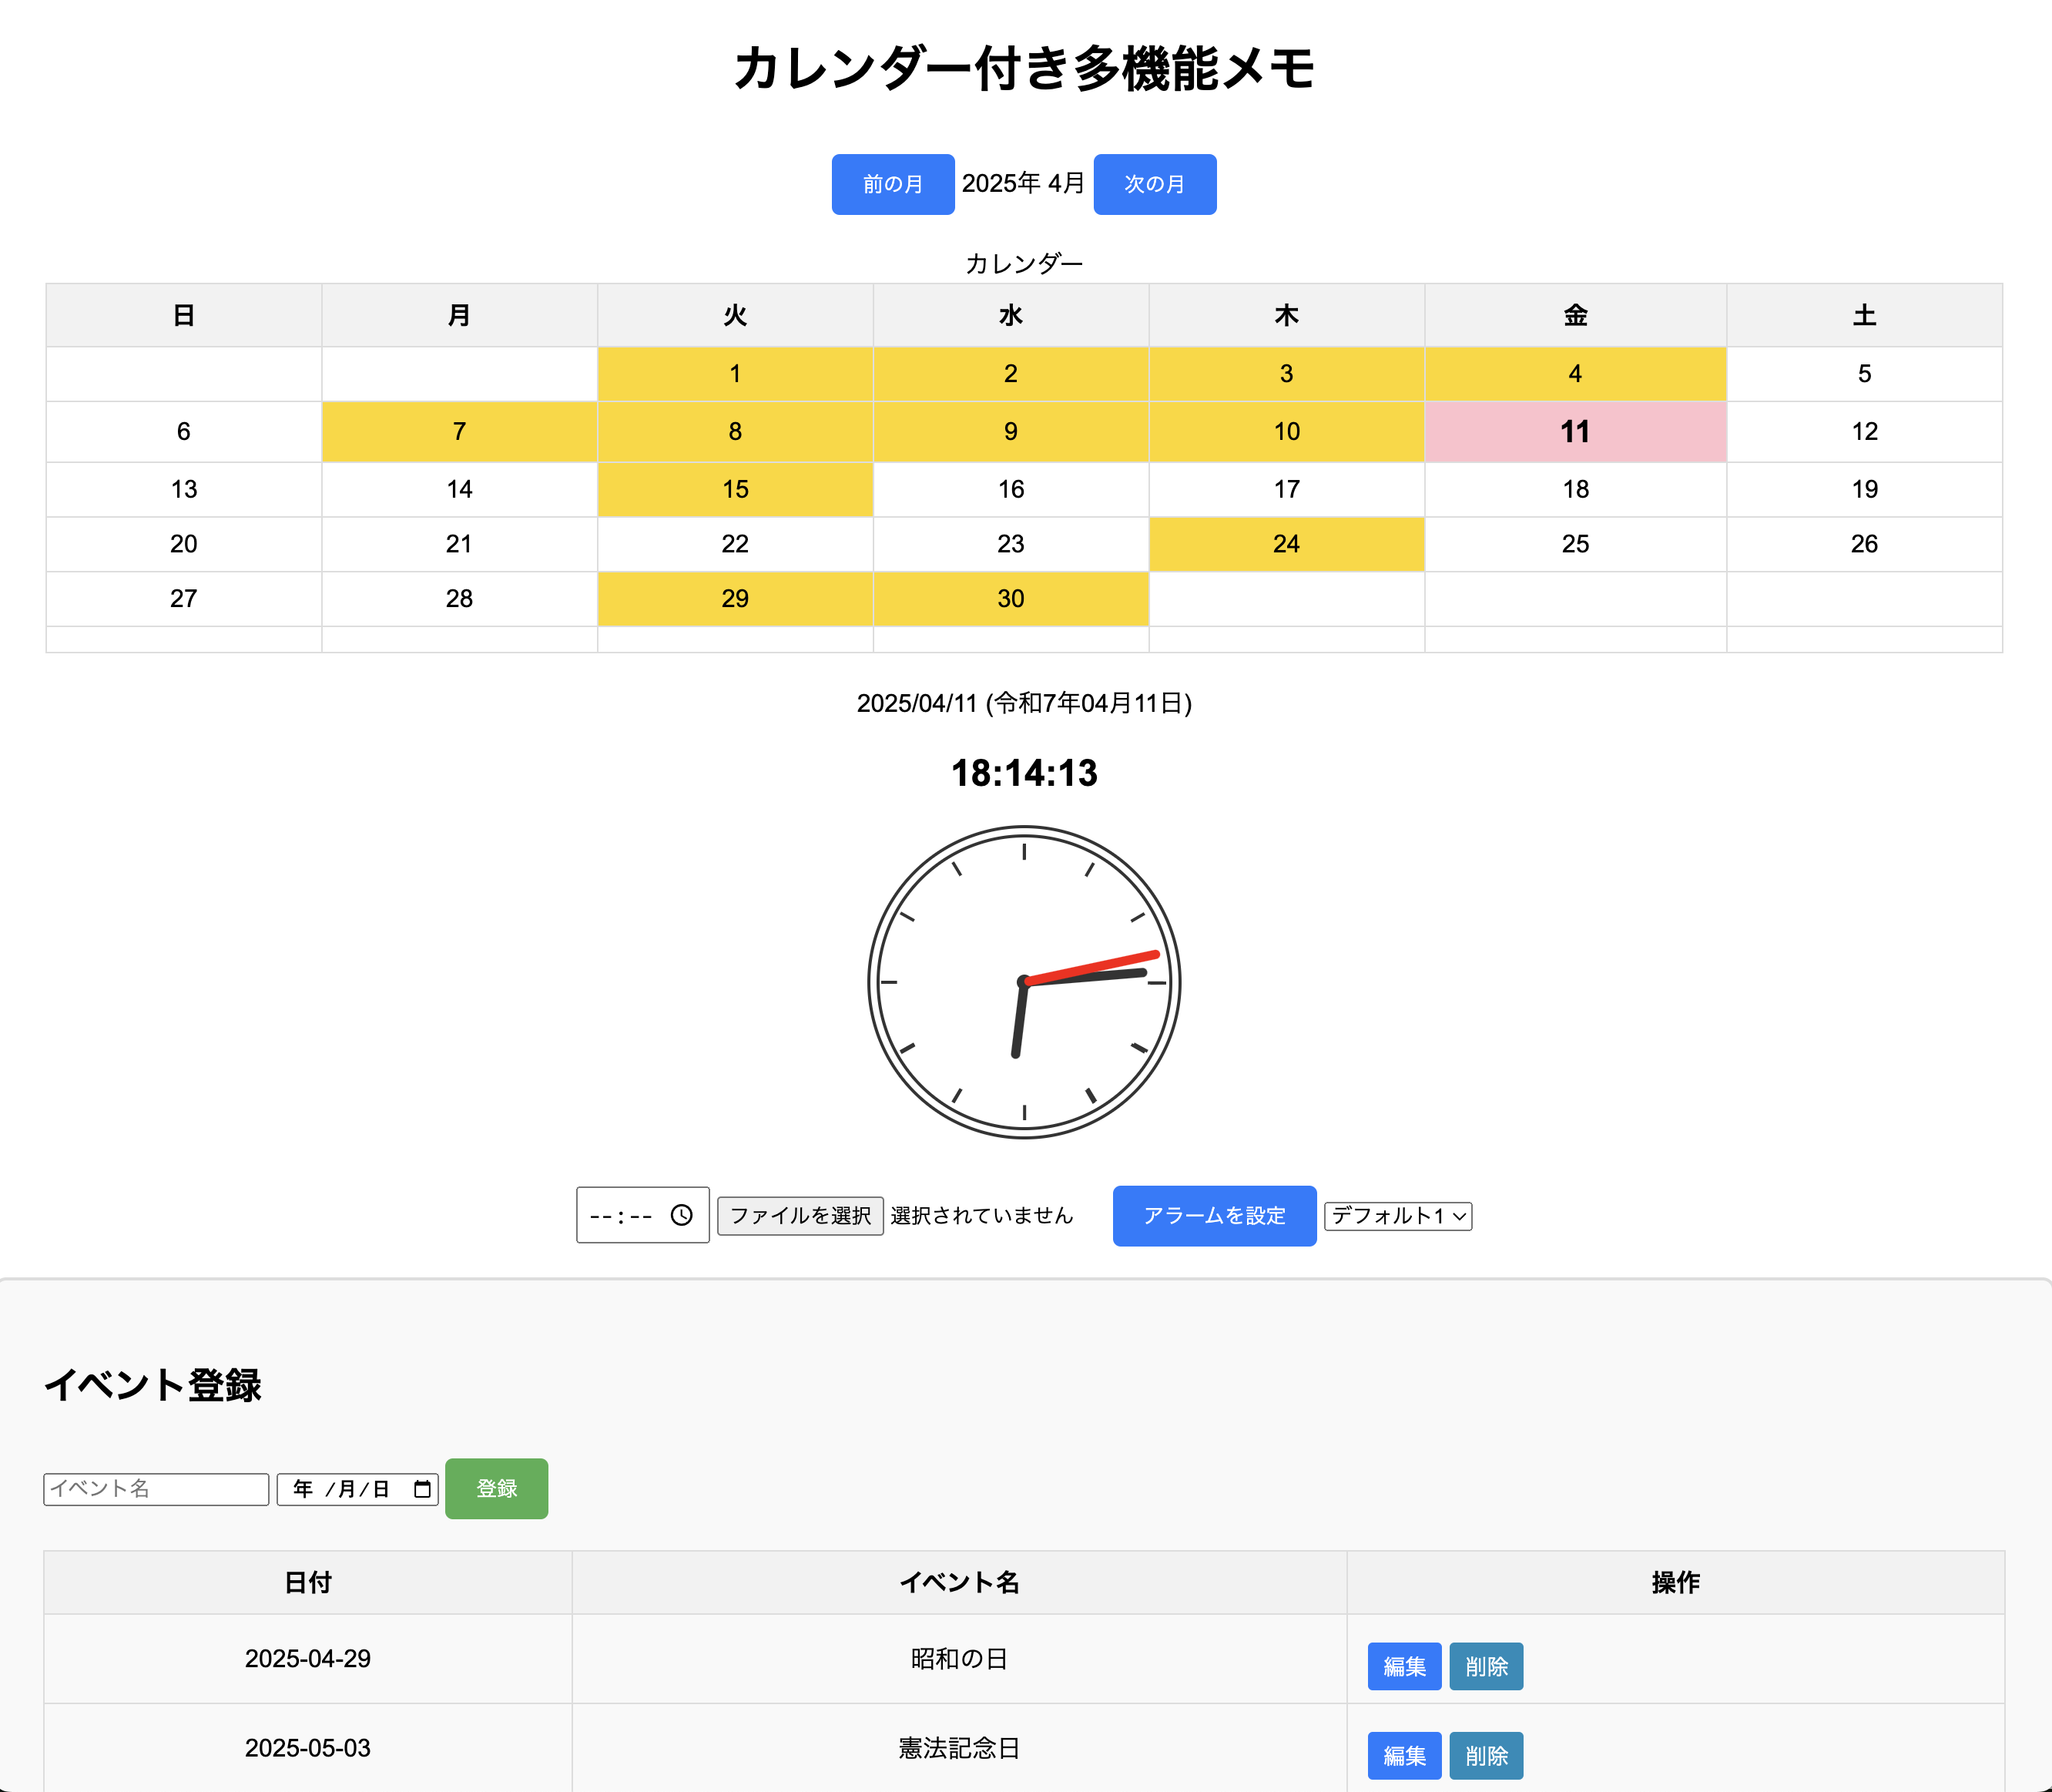
A small stationery item that can be used to manage your own notes, calendars, and events. Record small ideas for the day. You can also set a timer to your favorite music. You can set as many mp3 files as you like.
For wordpress & PC
A small stationery item that can be used to manage your own notes, calendars, and events. Record small ideas for the day. You can also set a timer to your favorite music. You can set as many mp3 files as you like.
You can change the position of the clock by changing the position of the shortcode.
• Display at the top left:
clock_display position=”left-top”
• Display in the center:
clock_display position=”center”
• Display at the bottom right:
clock_display position=”right-bottom”
• Display at the top center
clock_display position=”top-center”
If you install a WordPress plugin into WordPress, you can display a clock on a post or static page using a shortcode.
How to use it in WordPress
1. Activate “Custom Clock Plugin” in WordPress admin panel → “Plugins”
2. Write the following shortcode in a post or static page:
3. clock_display
4. A clock and digital date will be placed on the left side of the screen.
You can change the position of the clock by changing the position of the shortcode.
• Display at the top left:
clock_display position=”left-top”
• Display in the center:
clock_display position=”center”
• Display at the bottom right:
clock_display position=”right-bottom”
• Display at the top center
clock_display position=”top-center”
Here are some specific steps to use the plugin properly!
1. Installing the plugin
2. Displaying the menu
After activating the plugin, you can display a scrollable menu on posts and static pages.
1. Open “Static Pages” or “Posts” in the WordPress admin screen.
2. Insert the [scrollable_menu] shortcode where you want the menu to appear.
3. Refresh the page and the scrollable menu will appear.
4. Adding posts
This is how to add posts to be displayed in the menu.
1. Click “Scrollable Menu Posts” from the left menu of the WordPress admin screen. (This custom post type is added when you install the plugin.)
2. Click “Add new” and enter the post title and content.
3. Click “Publish” and it will be automatically added to the menu.
4. Customization
If you want to customize the design or behavior of the plugin:
• You can adjust the appearance of the menu by modifying the CSS (style.css).
• You can change the behavior when clicked by editing the JavaScript (script.js).
• You can change the number and type of posts displayed by adjusting PHP (my-scrollable-menu-plugin.php).
What kind of customization are you thinking of? We can also tell you how to make more detailed adjustments! 😊
Click “Scrollable Menu Posts” from the left menu of the WordPress admin screen. (This custom post type will be added when you install the plugin.) Click “Add New” and enter the post title and content. Click “Publish” and it will be automatically added to the menu.
If the post content does not appear when you click it, please check the following points.
5. Post Permalink Settings
If the WordPress permalink (URL structure) is not set properly, the post page may not be displayed correctly.
• Go to “Settings” → “Permalink” in the admin screen and check whether it is set to “Post Name” or “Custom Structure”.
• If you change the setting, click “Save Changes” and try again.
6. Post Publishing Status
Make sure the post is “Published” and not “Draft”.
• If it is still in draft, the page may not be found when you click it.
7. Reset WordPress rewrite rules
If the URL structure is not updated, you can reset it by following the steps below.
1. Go to “Settings” → “Permalinks” in the admin panel and click “Save Changes” without making any changes.
8. Features of this plugin
✔ Create a custom post type (scrollable_menu_post)
✔ Display menu title (Post menu)
✔ Automatically display every time a post is added
✔ Transition to post with a click (use get_permalink() in data-url)
✔ Display menu anywhere with shortcode [scrollable_menu]
9. Installation and usage
1. Upload the plugin to WordPress and activate it
2. Add the shortcode [scrollable_menu] to a post or page
3. Create a post from Admin panel → “Scrollable Menu Posts” → “Add New”
5. Check the page and check if the scrollable menu works!

This is a scroll function plugin for wordpress homepages.
As of April 2025, they are compatible with each other.
The php code is as follows.
/**
* Plugin Name: Custom Scrollable Post Menu
* Description: Displays posts of a specific category in a scrollable menu.
* Version: 1.0.0
* Author: TakuoKamiya
* License: GPLv2 or later
* License URI: http://www.gnu.org/licenses/gpl-2.0.html
*/
1. Posted items are displayed automatically.
2. Post names are colored.
3. The function works by writing a shortcode at the beginning of a post page or static page.
4. You can change the number in number=”7″ yourself. This number indicates the number of posts to be displayed.
5. This table is placed in the center of the screen.
Examples
https://xn--vus607cbrfwdv34a.com/
The shortcode is “scrollable_post_menu number=”10″ ”
“